Folk musics and social justice

Hi all -- Christopher here.  Lately, I've been thinking more and more about the ways that we use music in our lives -- soothing a crying baby, offering praise, or just joining together for the sonic satisfaction of putting words and melodies and rhythms together to create a group musicking experience that can be incredibly powerful.  There is also a rich tradition of songs and folk musics used as forms of protest, or to comment on the status of particular aspects of the world we live in.

As we get towards the end of the year, I often begin to think: What’s the big picture here?  What do I want my kids to walk away with?  The most important thing is always for them to love music, to feel that the musical experiences that they have in music class fulfill them and make them want to go on to create music for the rest of their lives.  I also want them to get those music literacy skills, because even if they don’t know it, I know that being able to read and write music will be a valuable skill in helping them attain that first goal of lifelong music-making. 

But I also want them to think broadly about the world, and to understand the ways that music can work in it.  Particularly towards the end of the year, when the literacy elements are all in practice stages, I am comfortable taking more time than usual to engage in discussion about issues that come up in the music that we do in class.  And sometimes, to seek out musical experiences for them that will raise important issues for them to consider.  Here are a couple of experiences that have worked for me in the past couple of months.

Grade 5: Those Gypsies, How They Rove…

Fifth graders at the end of the year are often an interesting bunch – ready to move on to middle school, with the attitude that goes with that, but still in many ways children.  I feel that they are just able to understand (and experience) the very tip of some of the more sophisticated emotional experiences in life, and finding ways to tap into their deepening maturity can be a powerful experience for me as a teacher.

The Gypsy Rover is one of the songs that can do that.  The text of the song refers to a “lady” who leaves behind her finery after she falls in love with a traveling gypsy.  Her father is none-too-pleased about this turn of events, and goes after her to bring her back to their castle.  In the end, though, he finds her, and the classic fairy tale ending ensues in which the lady tells her father that “he’s not a gypsy, my father…but lord of these lands all over.” 

Before they ever hear the song, I ask the students what they know about gypsies.  Usually, kids have the carnival-like visions of women in flowing head-scarves, looking into crystal balls to tell your fortune, and there’s always laughter as we talk about these ideas.  But I also usually have students who state that they think that gypsies travel a lot, in caravans, and that they sometimes steal your stuff.  At this point, I transition into some cultural information about the Roma of Eastern Europe, a nomadic people who have long been very poor and experienced discrimination.

Then, I perform the song while they listen, papers in hand, to figure out what happens in the story.   


2. She left her father’s castle gate,
She left her fair young lover,
She left her servants and her estate,
To follow the gypsy rover.

3. She left behind her velvet gowns
And shoes of Spanish leather
They whistled and they sang ‘till the greenwood rang
As they rode off together.

4. Last night she slept on a goose feather bed
With satin sheets for to cover,
Tonight she sleeps on the cold, cold ground,
Beside her gypsy rover.

5. Her father saddled up his fastest steed,
And roamed the valleys all over
He sought his daughter at great speed
And the whistling gypsy rover.

6. He came at last to a mansion gate,
Down by the river Crady,
And there was music and there was wine,
For the gypsy and his lady.

7.  “Oh, he’s not a gypsy, my father,” she said
“But lord of these lands all over,
“And I will stay ‘til my dying day,
“With my whistling gypsy rover.”

While it seems straightforward to me, they aren’t always so sure, and have lots of ideas that I might not have thought about: Is he a gypsy?  Isn’t he a gypsy?  If he’s not a gypsy, why would he lie?  Did he break into an abandoned castle to pretend he’s rich?  Could it be that she has more than one castle, and they are in one of hers?  The students use examples from the text to support their assertions. 

Their understanding of the song evolves as we continue to sing it in future classes, and it leads to continued discussion about stereotypes and oppression.  The students relate the discrimination that the real-life Roma have faced (and continue to face) to groups in our country.  Economic inequality comes up, and the ways that this can affect the way people are viewed by others.

While many recordings use a rollicking 6/8 performance style for the piece, I prefer a slower, contemplative on, inspired by a recording by Jill Trinka.  I accompany the song on the dulcimer, finger-picking a repetitive, fairly easy pattern that I modified from Jill’s version.  It’s a mesmerizing song for the students, one of those songs that worms its way into the souls of many of them.  I teach in a K-8 school, but I only teach the students up until 5th grade.  When I run into these students in 8th grade, this is one of the songs that they will often bring up, when naming their favorites.

Grade 3: Whose Land is it, Anyway?

This Land is Your Land: A classic!  Woody Guthrie wrote the wonderful text to a tune based on an old gospel hymn, and I really wish it was our actual national anthem.  In the late 1990s, a picture book version of the song was published, with wonderful drawings made by Kathy Jakobsen.


This has become a staple of my classes towards the end of the year.  I think that this is one of those songs that all students should know.  Since the range is fairly small, even the kindergarten students can sing it (at least the chorus).  The detailed pictures chronicle many regions of the United States, with a diverse group of peoples scattered throughout the pages.  The images have a lot going on in them, and younger students sometimes want to stay after class to examine a picture up close.

By third grade, they are able to grapple with some of the more sophisticated text:

In the shadow of the steeple, I saw my people,
By the relief office, I saw my people
As they stood there hungry, I stood there asking:
Is this land made for you and me?

Up to this point, the images have been rosy views of a multicultural, gorgeously scenic country, and the image Jakobsen uses here stands in stark contrast:


We talk about what a “relief office” is, I first ask the students to explain what is different about the text at the end.  After they identify that the statement in the last line has been turned into a question, they have to come up with reasons that this might be the case.  All students in third grade can’t figure this out – but there are always some students who are able to articulate the idea that if we’re a great country, why is there still hunger?  They can make connections to other problems that we have in our country today (homelessness is one that comes up most often for my city-dwelling third graders).

The picture book goes from there to another verse:

Nobody living can ever stop me,
As I go walking that freedom highway,
Nobody living can ever make me turn back:
This land was made for you and me.

At this point, Jakobsen brings back the picture of the run-down church, but now the church is spruced up, with people working to paint the exterior, pick up trash, and plant gardens. 

The third graders can make the connection that we need to all pitch in, that if we work together we can make the country a better place.  It’s a simple idea, I think, but with the song, the pictures, and the discussion, I believe that it plants those seeds that will help turn out adults who give back to others.

Grade 1: Can you Didjeridoo it?

The first graders in my school study Australia, and I have tried to integrate with the classroom teachers by including a unit of music on Australia.  There’s a great Smithsonian Folkways unit on Aboriginal didjeridoo music created by Cyndy Nasman, one that I modified to work in my class.

Here's the album she used:


And here are her lesson plans (Note: I'm happy to send on my powerpoint slides, if you'd like them):

I love listening activities that expose students to music from other cultures, particularly music like this in which the vocal timbres are different and the didjeridoo has such a unique sound. 

The connections to social justice come up when talking about the performers.  Traditionally, the didjeridoo was a man’s instrument in Aboriginal culture.  So the question for the children is: Is this fair?  They are a little bit too young to weigh the pros and cons of cultural rights vs. gender rights, and so most students usually say that they do not think it is fair.  I tell them that in our country, the types of jobs that women and men were able to get were restricted.  I ask if they can think of other places in our country where you would only see men or women.  Various ideas come up: professional baseball, single-sex high schools, the priesthood (I teach in a Catholic school).  In first grade, the length of time that they can focus is about the size of my pinky, but a quick minute or two of these sorts of ideas can start to get them thinking about these issues.

Enjoy the rest of your school year, everyone!

8

A Couple "Games" for Reading and Writing Unknown Rhythms

Hello there!!!  This is Amy from Music a la Abbott blogging.  I hope you all are having a fabulous spring!  I'm wrapping up school, with tomorrow being my final day with kiddos and then a work day on Friday.  As I reflect on the year there were many things that were accomplished in my classroom and one of the goals for my students this year was for them to become more proficient and successful at reading unknown rhythms.

Those of you familiar with the Kodály methodology known that reading unknown rhythms comes in the later practice stages of teaching a rhythmic or melodic element.  Today I'm going to focus on two rhythmic late practice activities that we did in my classroom this year, with one of them being in the last week of school.  Crazy, I know!  Practicing rhythmic reading still in the last week of school, but when done in the situation of a "game" the kids don't know that they're actually (shh. ..  . . ) working!!!

Unknown rhythm reading #1: "High Five Rhythms"

This is actually a play on a paper plate relay activity that I presented at the Colorado Music Educators Conference in January and I'm going to give credit to Jenna Olschlager (an amazing colleague, friend and music teacher in CO) for this idea.

I found some foam die cut hands in the dollar bin at the local Target at the beginning of the school year.  On these, I wrote one beat rhythms: ta, ti-ti, rest, tika-tika, ti-tika & tika-ti.  (I used this with 2nd grade at the beginning of the year for review but other than that I used these in 1st and 3rd grade for late practice).  On the back I placed a magnet:


On the board I placed 4 hands, like below:

The students, sitting in a horse shoe shape facing the board had a partner.  Each set of partners was given one had between the two of them that had one of the known rhythmic elements.  One of the partners was assigned the "taker-offer" and one was assigned the "putter-oner".  The essential idea was that the first set of partners would come up, the "taker-offer" would remove one hand (of their choice) and the "putter-oner" would put their hand up in the place of the one taken off.  The class would then read the new rhythm.


Then the next set of partners would come up, take a hand off and replace it with the hand that they had and the class would read the new pattern.  This continued until we made it through all the sets of partners.


To "kick things up a notch" I also recorded their time and their class would "compete" against the other classes to see which class could have the fastest time.

Here's an example of how this looked with 3rd grade rhythms:


Something I'd like to add to this next year, since this year's first graders have done this, is to use the foam mittens that I have to prepare half note.  Wouldn't it be cute to have two mittens with "tas" on them tied together with a mitten clip to represent the tie when they're learning the critical elements of half note?!

Some "house keeping": I get asked a lot on my own blog how I organize my manipulative, well, here's one way.  I LOVE the 80 cent plastic shoe boxes that you can buy at Walmart for storing manipulatives:

They keep the manipulatives looking nice, the boxes stack well and I can write with a Sharpie on the side of the box what the manipulative it that's inside so I can find it easily!


Unknown rhythm reading #2: Rhythm Dice Boggle

Last year on my blog I posted about rhythm and solfa blocks.  I'm a big believer in getting as many uses as you can out of a manipulative.  So, this past week we played rhythm boggle with my 3rd graders to practice ti-tika.

I already had my blocks sorted into sets of 16.  In groups of 2-3 they were given a set of block, they rolled them out onto the floor

And then put them into a 4 x 4 grid like this:

Then, using a tally sheet, the student wrote as many 4 beat patterns as they could find in 3 minutes. The blocks had to be adjacent (next to or diagonal from each other) in order to write a rhythm.  They recorded them on this sheet:

This worked so well that I actually made some pre-made worksheets so I can use it in centers or leave it for a sub next year:

The other thing I liked about this was that with my higher level thinkers I could have them compare answers and any identical answers they had to "cross off" their list, just like with the real game of Boggle.

I hope that you all have a wonderful end of your school year (if that's your calendar, I know some of you are out of the United States or on year round schools).  I'm off to start summer! :)

0

Slap Happy! A Rhythm Practice Game


Hi, this is Tanya from Teaching Music: Tanya's Kodály Aspiring Blog.

Today I have a new game to practice reading and articulating rhythms to share.

Slap Happy!


A while ago I purchase these foam sticks on sale from a craft store. When I first saw them I almost passed them by, (I already have stacks of colored foam sticks,) until I noticed they are actually slap bracelets! I spend a fair amount of time reminding students how to treat manipulatives; many kids constantly fidget with, toss, and bend staff boards, note heads, and flash cards. Here is a flashcard they can slap on their arms over and over again!

The first graders are deep in ta, ti ti, and rest practice so I thought I'd try out this new game on them.
On the inside of the sticks I wrote several 4 beat rhythm patterns. 
Then I play some recorded music while showing one slap bracelet pattern. John Feierabend's Keeping the Beat has many pieces that work very well for rhythm chanting, (several pieces are in triple meter, so use accordingly!) Last week I played the Prelude to Act 1 of Bizet's Carmen for our rhythm chanting. I saw the Opera Colorado production of Carmen last week and that familiar, lively music has had a motivating influence on me lately, so I brought it to the first graders. (How lucky are we that we get to share wonderful music with children?!)

Students chant that rhythm and repeat it until I reveal a different pattern on a new stick.
Then I pass out one stick per student. That's when they discover they are slap bracelets and start slapping away. Ah, the power of novelty!

Everyone stands and we step to the beat around the room to the music while the music plays. When the music stops, students freeze and I choose a student to spin the colored spinner on the SMART Board. If the spinner lands on their slap bracelet color, those students simultaneously speak their rhythm.
After every color has spoken their rhythm, it's time for round 2.
I change the music to Pharrell's Williams' song Happy. (Again, the power of novelty!)
Now when the music stops and students freeze, they find the person they are closest to, read their slap rhythms to one another and trade slap bracelets. 
1st Graders are Slap Happy!
That is as much as I've done with this game but I have several variations in mind that I'll be trying out next week. Here are a few:
  • Add rhythm patterns to the spinner. Students speak 8 beats of rhythm; the spinner pattern plus their slap bracelet pattern.
  • Use the spinner and all of one color chain rhythms together as students solo speak their rhythms.
  • Students compose longer rhythm patterns by using colors: alternating colors (red, blue, red, blue), grouping with the same color, using only one pattern of each color, or another color pattern they create.
  • Students compose a pattern by laying 4 rhythm patterns down but turning over one of the slap bracelets (a "blank" bracelet.) Students improvise a 4 beat rhythm when they come to the "blank" bracelet.
  • Use bracelets as a "ticket out the door;" they must speak their rhythm before lining up. For more of a challenge, students must speak their rhythm and then improvise a 4 beat rhythm.

There are many more possibilities for practice, of course. Unfortunately the school year will run our before I have the opportunity to take kids through several variations. (There's always review for August!)  Thank you for reading. I hope you have a happy end of the school year!

4

Technology Tips for the Kodaly-inspired Classroom

Hi everyone, it's Aileen from Mrs. Miracle's Music Room. Last weekend, I presented a technology workshop for VOKE. I really enjoyed presenting the workshop, and as I was putting together materials for it, I was reminded of how anti-technology I used to be.

I admit it...years ago, when I heard the word "technology," I would shudder. It was starting to become a buzz word, something that would be hailed as the "next best thing." I had visions of active music making going out the window and being replaced by students sitting at computers using notation software. (Not that this is a bad practice all together, but I didn't want to lose the music making in my classroom!) I used to brag that I could teach only with a tuning fork. I've come to realize, though, that just because you CAN do something, doesn't mean you should.

So I guess the question boils down to this: why use technology in your Kodaly-inspired classroom? I'm stubborn in that I refuse to do something just because everyone tells me I should, which is why I was initially anti-technology. Here is my list of reasons to implement technology in your classroom:

  • To create an exciting, interactive environment. So many of our students are very comfortable with technology, and there are so many great things you can do with it!
  • To save time. This, to me, is one of the biggest reasons I use technology. While initially, it may be time-consuming to learn and make resources for a specific technology (like the SMART board), it can eventually save you time.
  • To create unique experiences that wouldn't be possible otherwise.
  • To collaborate with other teachers from around the world.
  • To research.
Let's start with creating an exciting and interactive environment. One of my favorite types of SMART board files is the "sentence arranger." This is a great way to teach students a new song...simply have them listen to you sing, and then have them arrange the lyrics by dragging and dropping! You can download an example for "I've been to Haarlem" here:


This week I used the "Starry Night" app to have my students brainstorm words and phrases for a "Starry Night" haiku, which they then added solfa to, notated on the staff, then transferred to the dulcimer or a barred instrument. There were so many "ooohhh's" and "ahhh's" when I projected the app from my ipad to the TV screen, and then they got more creative with their brainstorming!

You can download the app here:

How can you save time with technology? One of my favorite ways to save time this year is to hyperlink all of my files on my agenda which I project onto my SMART board, so I don't have to open multiple files in the morning before my lessons begin. I got this great idea from another music blog and of course now I can't remember whose! Read this blog post about creating an agenda; here is a picture of a sample agenda:


In the above agenda, I had a SMART notebook file for "Star Light," so when we got to that part of the lesson, I just touched the words on the SMART board, and the file opened! To hyperlink in Powerpoint, select the text you want hyperlinked, right click, choose "hyperlink," and then choose the file to which you want to hyperlink. This has been a great time-saver, between the fact that I don't have to open up a bunch of new files every morning, AND I don't have to write and rewrite anything on the board as new classes come in; I can just close the file, hit "don't save" (unless there is something I need to save), and I'm good to go!

Another great way to save time is with the "Smart Seat" app.


One of the tasks I have always loathed is creating seating charts...and this makes it SO much easier. It allows you to create charts in several different layouts, take pictures of each child, print out the seating chart to yourself, and so much more!

GarageBand is a GREAT way to create musical experiences not otherwise possible. You can now download GarageBand for free with in-app purchases. See more by clicking below:


I'm not an expert at GarageBand, so here is a great tutorial from Music and Technology you can purchase:


This book has also been very helpful; click the picture to see it on Amazon.

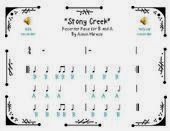
Maybe you're thinking, "I can't have my students use GarageBand...I only have one ipad!" You might consider working in learning centers, and you can also use GarageBand to create accompaniments and songs for your students to listen to or play along with. I created this recorder song and accompaniment on GarageBand that you can download for free for your beginning recorder students learning B and A:


To collaborate with other music teachers, you can simply hop over to the "Kodaly Educators" group on Facebook and ask your question! I've also asked questions on the Organization of American Kodaly Educators page and Ipads in the Music Room page. There are so many great minds there who are willing to give advice and answer questions!

As far as research goes, I LOVE using the Holy Names Kodaly website to search for folk songs! It is like an index many of us had to complete for our levels...but it is online and free! Click here to check it out. You can also read Christopher Roberts' thoughtful blog post on the Kodaly Corner about using the Smithsonian Folkways website to research folk songs from around the world.

This is just a sampling of technology ideas for your classroom that could be added to your Kodaly-inspired lessons to make them even more magical. Have any other ideas? Please comment below (and check out some tips for using Twitter I recently posted at my blog!)

Thanks for reading!

0

Keep 'em Busy

   
Happy May! I hope you are enjoying the last few weeks you have with your students. This is Jamie, and I’ve got just a little over a month left with my k-4th graders. In this final stretch, I have to remind myself of the best classroom management technique I have ever learned: Keep ‘em Busy!

I don’t know about your students, but mine seem to go crazy once we hit May. If they have even a few moments of down time, they take full advantage of it! My best mentor teachers have all taught me to make every second count in the classroom. Music class needs to be so engaging and fun that the students only have time to think about joyful music making.

Here are some of my favorite activities for my older students that seem to go over well during the month of May:

Magical Pattern Aural Game
This activity could be used in preparing or practicing any rhythm or melody concept. Choose one pattern to be “magical.” Since my fourth graders are currently practicing Tom Ti (dotted quarter/eighth note), I might use the pattern “Tom Ti Ta Ta” as the magical pattern.

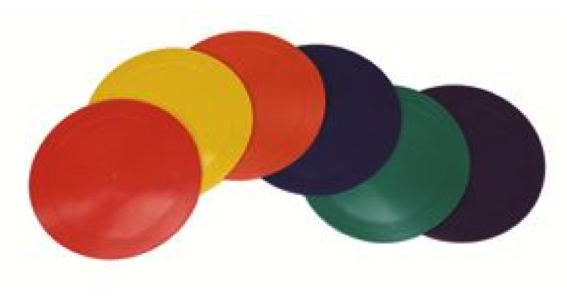
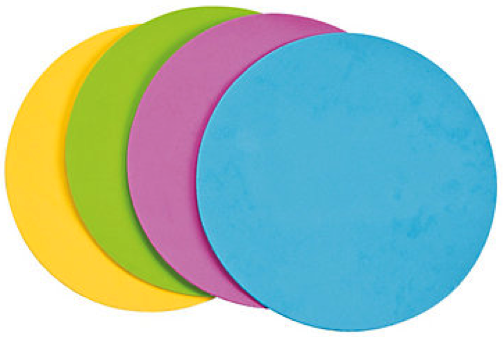
Place many circles around the room. You could use Poly Spots or even foam circles.

http://www.westmusic.com/p/west-music-ytb-013-9-round-markers-set-of-6-540079

http://www.orientaltrading.com/api/search?Ntt=IN-13639841


Then, have the students march around the room. Tap many patterns as the students march. Whenever you tap the magical pattern (Tom Ti Ta Ta), the students must stand on a circle. After each round of play, take away 3-5 circles. Those students not on a circle when the pattern is tapped are out.

 
Write Melodic Patterns with Manipulatives
I love using manipulatives in the classroom! My students love to have objects in their hands to write with, and I have found that it is super easy to assess them as they’re working. I try to have many different types of manipulatives so that the students view each writing experience as something “new.”

Right now, my students are practicing the melodic pitch fa. I purchased these small wood blocks from my local craft store:
http://shop.hobbylobby.com/products/3/4-birch-cubes-622159/


On each side of the blocks, I put a different solfa pitch (d r m f s l) with permanent marker. Then, I bagged the blocks up for my students. I am going to have my students work in pairs for this activity, so I made 15 different bags with 8 blocks each (120 blocks total).

When students are writing patterns, they will choose the pitch and show the contour with their blocks like this (pattern is from the song, On a Mountain):


You could have your students take dictation with these blocks or you could even have them compose their own patterns.


Save the best games for May
I try to save some of the all-time favorite games for the end of the year. One of the favorites at my school is Ye Toop Doram:

Game Formation: Seated in a Circle
Game Play: During the song, a ball is passed every two beats (twice per measure). Stop passing the ball on the word, “seh.” The student with the ball on the word, “seh,” goes to the middle of the circle. The other students roll the ball back and forth across the circle, trying to tag the student in the middle. The student in the middle must dodge the ball for the entire “Kel kel kel lee-a-lee-a” section. For more fun, you could add multiple balls.

 
Move, Move, Move!
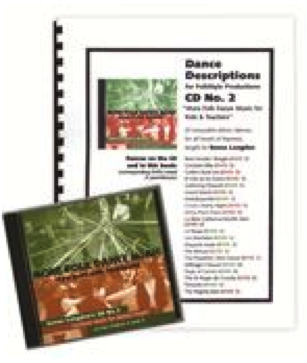
During the final month of school, I like to add more folk dances to my lessons to allow for more movement. One of my favorites is “Los Machetes” which is included in Sanna Longden’s book, More Folk Dance Music for Kids and Teachers.  
http://www.westmusic.com/p/more-folk-dance-music-for-kids-and-teachers-cd-850483
  
Perform the search, “Los Machetes Stick Dance,” on YouTube to view the dance. So much fun!


Enjoy your last few weeks of school!
    
3

Throwback Thursday: Maypole in the Music Room

Hello,

This is Lindsay Jervis, blogging from Wichita, KS.

First I wanted to share a bit of news, for celebrations, encouragement and words of wisdom that you might offer. I just found out yesterday that I was elected president-elect of Kodaly Music Educators of Kansas.  I am so excited and care so much about our organization that I hope I will be a great VP for the next two years and a good president when it is my turn.

As music teachers, we always take on so much. I just finished my Kodaly Certification last summer from Wichita State University and I am currently still working on my masters.

I have a young daughter who will turn two this summer, and will hopefully have another baby before my term is up as president. I was a little leery about whether the timing would be right for me and my family for me to accept nomination for this position, but I feel so strongly that our organization is making a difference in our teaching and in our students lives, so I feel that it is a task worthy of my time and effort.

KMEK will be super busy over the next few years as we gear up to host MKMEA in 2015, so we will sure have a lot on our plates!

I would love any advice, tips, of anything you can offer to me as I take on this new commitment in my area to bettering our organization of music teachers.

Now, on to my post!

I am going to do a little "Throwback Thursday" in celebration of May Day. You can find links to many other great "Throwback Thursday" blog posts on Aileen Miracle's blog.


This post is a throwback from my blog, Pursuit of Joyfulness written in May of last year.


When I took the job at my school two years ago, I inherited this fantastic maypole:
Apparently the maintenance people (who are amazing!) at our school made it a few years ago. The pole is a really thick pvc pipe. The ribbons are attached to a rotating bike wheel at the top. Even though it rotates, the ribbons still create a fantastic weave! Usually sand bags are placed over the boards at the base, but we could not find them. The must have walked away for something else.

Last year I did not get the maypole out because I had no clue how to do it or teach it and it seemed incredibly daunting last year. This year as May drew nearer I knew that I wanted to try it. I started researching maypole dancing.

Here were some helpful links:
http://www.maypoledance.com/maypoledance.html


And here is a link about making your own:
http://www.maypoledance.com/maypole.html

Procedures:
1. Have every student stand beside a ribbon
2. Demonstrate how to hold the ribbon (in your hand farthest away in the maypole,using your other hand to guide the ribbon over and under). I had everyone facing clockwise. Our ribbons were long enough that I told my kids that they should have a "tail" hanging down from their hand. We practiced how to make the tails longer or shorter so that the ribbons would not touch the floor.
3. The first time through we just walked in our circle. We may sure not to pass anyone and keep ourselves evenly spaced. Once I could see that was successful, we would turn and go the other way, then we would try the same thing with skipping feet.

4. Then we would number off (1, 2) and I would have my 2's (blue in picture below) stay put and my 1's (greens) got to weave in and out the 2's. I would call "under" and "over" and I modeled what that would look like for both ones and twos. Starting out we moved very slowly and I would wait til all my ones had progressed one space before I would give the next call. In a few of my classes I would have a student who would move ahead of my instructions and it would mess up the weave and we would have to restart. After that, everyone listened perfectly because the really wanted to be able to create the weave and unweave it correctly. 


My first graders were even able to do this weave! Here's a picture from one of my third grade classes. Sorry it's not the best quality but it gives you an idea. I didn't have enough kids for every ribbon, so I wound the extra ribbons around the maypole before we started the song so they would be out of the way. You can see them below the weave in the picture (blue and orange ribbons). 


Here is a link to some other weaves you could try: 

The music I used to accompany our maypole dancing was from the Amidons CD that I already owned. I did not buy any specific music for the maypole, but I just used an instrumental reel and it worked perfectly.

Please let me know if you have any additional resources for music/dances to do with the maypole!

0
Back to Top