Showing posts with label Composition. Show all posts

Fostering a student-centered environment in the music room

Hi everyone! This is Aileen from Mrs. Miracle's Music Room. Today, I'm blogging about something that has been on my mind quite a bit lately as I've been planning lessons: how to foster a student-centered environment in the music room.

Fostering a student-centered environment: Great ideas for the music classroom!

There are so many things that I love about the Kodály-inspired classroom...but at times, it can feel somewhat teacher-centered if taught in a traditional way. Sometimes, students DO need a whole-class approach. They need to sing together as a community, they need to prepare and practice rhythms and solfa together, they need the teacher to share musical knowledge. However, at some point, in order for students to transfer their knowledge, the teacher does need to step away and become more of a facilitator. So how do we do that in a Kodály-inspired classroom? Here are my favorite strategies!

#1: Rotating Centers
Several years ago, I began experimenting with centers in my classroom. I had seen them done well in my daughter's Kindergarten classroom, and thought I would try it in my room. It has been a wonderful journey, and a great way to not only foster a more student-centered classroom, but to provide time to work with and assess students one-on-one while the other students are engaged in exciting activities! With rotating centers, I typically have four centers around the room that are focused on practicing the same concept in different ways. For example, for ta and ti-ti, I might have one center at the SMART board, where students are throwing a squishy ball at the board and then reading patterns, another center in which students play rhythm patterns on non-pitched percussion, a third center with worksheets for ta and ti-ti, and the last center with me, in which each student individually reads five patterns. Every five or so minutes, I have students rotate to the next center until they've been to all of the centers. It does have a much more student-centered feel to it, because instead of you teaching the students, students are often teaching each other! Whether they are explaining to each other how to play High D on the recorder, or reminding each other that la is a step above sol,  it's a really awesome thing to step away and let students process the information and teach each other! If you're looking for more information about centers, here are several blog posts with more details about using centers!
3

Singing, (playing, and writing) the blues

Hello! This is Tanya from sunny Colorado. Yes, while the East coast just dodged a huge snowstorm, we've had a week of temperatures in the 60s and 70s. The weather predictors have told us we'll have snow every day next week. As they say around here: f you don't like the weather in Colorado just wait fifteen minutes!

Let's talk about the blues. In my district's music curriculum the blues are introduced in 5th grade and continued in 6th grade. In 6th grade I expand our unit to include jazz and a little rock and roll. The blues genre and form are so influential in american music and it's hard to know where to start. It's even more challenging to decide what to leave out. Here are the blues essentials I've used when introducing the blues as a genre and a form. For today's post I'm focusing on the AAB lyric form of basic blues. (I plan to discuss teaching the 12 bar blues harmonic form on a later blog post!)

Listening (and watching)
I would love to spend many entire class periods just introducing kids to various recordings of blues masters. Now that YouTube is around there are several documentaries and videos worth showing. 
The Martin Scorsese produced 2003 seven part documentary, The Blues, is an excellent starting point. The first film in the series, Feel Like Going Home was directed by Scorsese. It is an hour and twenty minutes long, (I don't show the entire film.) Don't miss the importance of John and Alan Lomax's collection (in the first five minutes,) the music of Lead Belly, and Muddy Waters' Rolling Stone (24:49-26:45)
To get the feel of the AAB vocal form, we listen to and sing along with the following recordings:

Good Morning Blues - Lead Belly
Stormy Monday Blues - T-Bone Walker
Love Me Like a Man - Bonnie Raitt
Sweet Home Chicago - Eric Clapton
Hound Dog - Elvis Presley


Lyric Form: AAB
I've found it best to first focus on the form of the lyrics.

Students right away understand the AAB lyrical form after hearing and singing a few blues songs. 

Good morning blues, how are you.
I'm doing all right, good morning, how do you do?
-       Good Morning Blues by Leadbelly


Process for discovering and singing AAB blues lyrics 

1.    Listen to Leadbelly recording while reading lyrics.
2.    Sing along with Leadbelly, making sure to wait/rest 8 beats between lines.
3.    Class observations regarding lyric pattern.
Lead students to recognize:
·      Lines 1 and 2 are the same
·      Line 3 is different and the last word rhymes with the last word of the first 2 lines
4.    Label as AAB form
5.    Listen to and sing other AAB lyrics (Stormy Monday, Joe Turner’s Blues, Crossroads, etc.)

Write verses in AAB form

Students enjoy writing their own blues lyrics but often have trouble coming up with that 
first line. For their first verse I provide sentence strips with a first line I wrote if they want to borrow an initial idea.

Here are some 1st lines my students have started with.
(Notice the easy-to-rhyme with ending words!)
·      Look out that window at the rain pouring down.
·      Each night I lay down but I can’t sleep.
·      If you see me walking down the street.
·      Some folks have everything they need.
·      I ain’t got no diamonds, I ain’t got no gold.
·      I think about the good times I’ve had.
·      What a dream I had last night.
·      I have to say what I’ve got on my mind.
·      Oh everyday I have the blues.
·      I try to do right and do what’s best.
·      My friends tell me I’ve been a fool.
·      Every day I feel so low.

 Students work in partners or alone to complete four to six verses.
That first verse is a jump-start that inspires them to write more verses but they are 
welcome to write their own first lines.
After completing their lyrics each class has a blues showcase during music
where they sing their blues for the rest of the class. It's very interesting to hear the 
students' lyrics and get a glimpse into their daily worries. 
Some students write goofy verses, ("Oh, I'm so mad, the aliens took me away!"), 
others really vent about real life frustrations, ("I hate my math homework, why do 
we have so much?") 

This is a simple blues introduction as we start soaking up a rich musical style 
and tradition in music class. 

What are your Blues basics?
2

Ways to Practice and Prepare Rhythms


Happy Fall!! I hope your day has been filled with colorful leaves, cozy scarves, pumpkin bread and warm cups of tea (or whatever it is you like about Fall!)

Awhile ago, I wrote a post where I shared a picture of my "cheat sheet" I use when planning lessons. If you haven't seen it, you can read the post here.  One of our readers asked if I could explain some of the items in more detail, and I am FINALLY doing it!  Since it is a lot to cover in one post, I am going to break it up into two posts...one for melody and one for rhythm. So, without further ado, I present...


To start, I made you a pretty file that you can print out to refer to if you are looking for inspiration when planning your lessons. You can access the file here...

https://docs.google.com/presentation/d/1Ni9Idv5whCX22E5EjGrg7RFNGg4ac0DG0Lzotp1EaQg/edit?usp=sharing

I tried to provide a short description of each activity below. Please feel free to comment with any questions!

1. Rhythm Question and Answer:
The teacher asks a rhythm "question." I usually use a four beat rhythm containing the rhythm element we are using. Students respond by improvising a four beat answer. Sometimes it helps to have four hearts or beat bars displayed. Then you can point to them as the student creates their rhythm to help them keep a steady beat.

2. Poison Pattern
The teacher claps a "poison" rhythm for the students. This is usually a four beat pattern containing the rhythm you are practicing. Then you clap a variety of four beat patterns, weaving in the poison pattern every now and then. Students stand and echo clap all the rhythms EXCEPT the poison pattern. If they clap the poison pattern, they are "out" and have to sit down.

3. Beat vs. Rhythm
This is a simple way to build part-work into your lesson. Divide your class in half and have one group pat the beat while the other performs the rhythm of whatever song or chant you are working on. Then switch. This can be done in partner pairs, small groups, etc.

4. Chair Dictation/Human Flashcards
This works best for quarter, paired eighth, half note, or syncopa. It gets tricky when there are more than two sounds on any beat. Set up four chairs and then have students sit on the chairs to represent the rhythms. For example, to write ta ta ti-ti ta, you would have one student sit on the chairs that are tas and two sit on the chair that is ti-ti. Then have the class perform the rhythm. You can give students rhythms to notate, have them make their own, or have them dictate what you play.

5. Fill in the Missing Measure
Write the notation to a song on the board but leave one or more measures empty. Have students fill in whatever is missing.

6. Sneaky Snake.
A description of this strategy can be found in "An American Methodology." Basically, you write a rhythm on a "sneaky snake" and cover it up piece by piece. It is great for musical memory.

7. Post Office
Each child gets an envelope with 6-10 rhythm cards inside. All envelopes are identical. They take out all the rhythms and display them so they can see them. Then, the teacher claps, performs or otherwise says a rhythm. Students have to find that rhythm and put it back in their envelope. The goal is to try to reveal the "mystery" rhythm, by putting all the correct rhythms back in the envelope until there is only one left.

8. Oops My Eraser Slipped
Write a rhythm on the white board. Once students have performed the rhythm, you "accidentally" erase one measure at a time until all the rhythm is erased. This is great for practicing musical memory. You can also have students write the rhythm back in once it is gone to practice notation.

9. Flashcards.
Read them, play them, walk them, clap them... :)

10. Glynnis' Game
This is sometimes called "I have, Who has." It takes a little bit of work to create, but it is a great way to assess individual students. In this game, every child has a card that says "I have (four beat rhythm), Who has (a different four beat rhythm)." Students say or perform their rhythm and it passes around the room. Look on TpT for pre-made sets!!

11. Drop 4, Add 4
Students and teacher stand in a circle. The teacher speaks or performs an eight beat rhythm. Then, then student next to them "drops" the first four beats of the teacher's rhythm and "adds" four of their own. The next student does the same and this continues on. For example...

Teacher: ta ta ti-ti ta, ti-ti ti-ti ti-ti ta
Student 1: ti-ti ti-ti ti-ti ta, ta ta ta ta
Student 2: ta ta ta ta, ti-ti ta ti-ti ta

12. Walk the Rhythm
You can either play or say a rhythm for students to walk or display a rhythm for students to walk. Great for your physical learners!

13. Dictation
Play or say a rhythm and have students notate what you say. This can be done on white boards or with pencil-paper. It often helps to provide students with a template where they fill in the measures.

14. Play on Instruments
Drums, pentatonic xylophones, rhythms sticks, you name it... kids love to play! You can have them read flashcards or echo play.

15. Fly Swatter Game
Post flashcards around the room and divide the class into two teams. Each team sends a representative up to the start line with a fly swatter. Then, the teacher says a rhythm and the two team reps have to try to find that rhythm and be the first to swat it. Whichever team swats it first gets a point.  I use this when I am teaching "Johnny Caught a Flee" and "Shoo Fly."

16. Aural Decoding
You play a rhythm and students decode it by saying the rhythm syllables. You can also have students play a rhythm for their peers. This is a great way for them to check if they are performing it correctly!

17.  Ostinato/Partwork
You can create a rhythm ostinato under almost anything!

18. Games/Hand Jives with Rhythm
Many songs and chants have hand jives that reinforce the rhythm. For example, the hand jive to E Poi Tai Tai clearly shows that there are four beats on the whole note.  These are great ways to practice rhythm, just make sure you draw students attention to the element you are practicing and make the knowledge known!

19. Rhythm Tic-Tac-Toe
You can check out my freebie on this of idea here :)

20. Rhythm Squares/Carousel
Put rhythm flashcards out in a circle. Students walk around the circle like a carousel while you play music (I try to choose something that we are using for a listening lesson.) Then when the music stops, they stop in front of a card. You can go around and have everyone read their card, call on specific students, or ask, "Who has...." to check their reading skills.

21. Heat beats above Words
Have the students draw the hearts above the words. This is great when you are in the prepare phase of teaching!

22. Fill in the Barlines
Write the rhythm to a song on the board and have students fill in the barlines. Simple and a great way to reinforce time signatures.

23. Rhythm Baseball
I'll be honest- I have seen this used, but not used it myself. I am sure that you can come up with some fun ideas, though!

24. Conducting
Having students conduct while they sing is a great way to practice longer rhythms like half note and whole note. They really feel that there is more than one beat for the sound!

25. Mystery Songs
Display the rhythm to a song without the words. Have students determine what the song is from reading the rhythm (or hearing the rhythm).

26. Song Sorts
Write each phrase to a song on a flashcard. Then mix them up and have students "unscramble" the rhythm. I often add an extra phrase to make it more challenging. There is an example of this in my Miss White file on TpT.


27. Composition
Having students compose is a great way to practice rhythms. They have to be able to notate correctly and represent what they think on the page. You can use whiteboards, do it as a class, have students write their own... I often find that once we start composing in 1st grade, I receive many, many "notes" in my boxes of songs students write. Once, I had a student give me a set of 100 flashcards he composed on index cards when they learned to write rest!

28. Rhythm Puzzles
Take an old (easy) puzzle and write the rhythms of a song on the back of it. Then have students put the puzzle together to reveal the mystery song/rhythm. They love it!

29. Worksheets
Search TpT....there are AMAZING resources! Also, if you have the McMillan McGraw music curriculum, there are many great worksheets in the Resource Masters that align with Kodaly instruction.

30. Listening Lessons
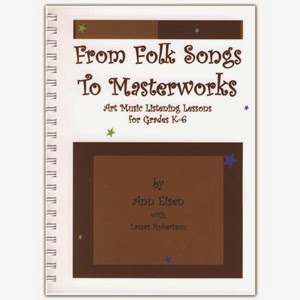
I always try to find a piece that clearly demonstrates the rhythms we are working on for my students to listen to. If you haven't yet seen "From Folksongs to Masterworks," I HIGHLY recommend you check out this resource. It has great listening connections to use!


31. Morse Code
In this game you have students work in pairs. A student taps a rhythm into their partners hand. Then the student who "received" the message tries to decode what they tapped.

Whew! Hopefully you gained an idea or two that you can take back to your students! Have a wonderful week!! 


1

Sequence within the sequence

Hi everyone! This is Aileen from Mrs. Miracle's Music Room

The Kodály philosophy is widely known as being very sequential. Kodály-inspired educators teach simpler rhythms and solfa first--those rhythms and solfa common in folk songs of the students' mother tongue.

The sequence of a Kodály-inspired classroom was very appealing to me as a new teacher. It wasn't until several years into my teaching, though, that I began to understand the sequence within the sequence.


After students learn ta and ti-ti, for example, we could immediately start throwing improvisation and instrumental activities at them...but they may not be very successful. By first starting with easier practice activities, such as reading rhythms and copying patterns, then sequencing to more difficult practice activities, such as composition and improvisation, students can be much more successful. Here is a typical order in which I practice rhythm. For this list, I'll use the example of ta and ti-ti, but it could be used with any rhythm:

Reading rhythms: After presenting ta and ti-ti, I have students simply read from rhythm flashcards, or read a rhythm of a known song from the board. I do this immediately after presentation, as well as in the beginning of the next lesson, to review with students what they just learned.

Writing rhythms: Students can use pencil and paper or dry erase boards and markers to copy rhythms from the board or from flashcards. This isn't dictation yet--they are simply copying rhythms that you either show them or speak. Much like a Kindergartener writing the letter "a" several times, this gets students comfortable with writing the rhythms.

Playing rhythms: Students can use non-pitched percussion to play patterns from flashcards, or can use barred instruments in C pentatonic to play the rhythm patterns on any bars they want. Sometimes students can say and clap patterns, but having a wood block in their hand is a bit different! Being able to transfer their knowledge to actually playing an instrument is a needed step.

Identifying rhythms: Students can either encode a pattern by hearing it then saying it aloud, saying the rhythm of a known song or chant back at you, or hearing a pattern then choosing which pattern it is (from a list of three patterns, for example.) This is almost dictating, but not quite, as they may be choosing from a list--like a multiple choice test--or may be identifying the rhythm without actually writing it down.

Dictating rhythms: Now students can finally hear a pattern, then either write it with pencil and paper or dictate the pattern with rhythm manipulatives, such as popsicle sticks.

Creating rhythms: Students now can transfer their knowledge and can create rhythm patterns of their own, perhaps by improvising spoken rhythms, or perhaps by composing their own 16-beat piece with known rhythms. The possibilities are endless!

This is not to say that you have to start at reading and work your way to creating in that exact order. In order to differentiate for your higher learners, you will want to have some challenging opportunities in early practice, and for your struggling learners, you will want to have some simpler opportunities in late practice. But having this order in my mind has really helped me unpack exactly what I want my students to do, and when. I just created this set to use with my own students when practicing ta and ti-ti; each week, I will add the next level of complexity.

Do you have any other steps in your sequence within a sequence? Feel free to comment below with any more ideas, and have a great day!

3
Back to Top